By Azura · Updated June 2026 · Raised Garden Hub is reader-supported. When you buy through links on our site, we may earn an affiliate commission at no extra cost to you.
The best thing you can do for next year’s raised beds is prep them properly this fall: clear spent crops, amend the soil with compost, and cover the surface to protect it over winter. You’ll start spring with alive, ready-to-plant soil instead of a cold, compacted bed.
Most gardeners spend enormous effort improving their raised beds in spring. The smarter move is to do most of that work in fall — when the soil is still warm, amendment work in easier, and you can establish a cover crop that actively improves the bed all winter. Here’s a complete fall prep sequence.
Why fall prep matters
A raised bed left bare over winter loses more than most gardeners expect:
- Soil structure degrades. Rain impact on bare soil compacts the surface. Freeze-thaw cycles break down soil aggregates. By spring, the top 2–3 inches can be noticeably denser than they were in fall.
- Nutrients leach. Nitrogen and potassium dissolve in water and wash through the soil profile with winter rains.
- Weeds establish. Bare soil in fall is prime territory for winter annuals — chickweed, hairy bittercress, henbit — that are fully established before you want to plant in spring.
- Soil biology slows unnecessarily. Covered soil stays warmer and more active longer, meaning more beneficial microbial activity and a faster spring rebound.
Fall prep prevents all of this in a couple of hours.
Step 1: Clear spent summer crops
After your last harvest, remove all summer crops from the bed completely. Don’t leave roots in the soil (except intentional green manures) — they can harbor disease and pests over winter.
What to compost vs. discard:
- Healthy plant material without visible disease: compost freely
- Plants with signs of powdery mildew, blight, or other fungal disease: discard or hot-compost (not a cold backyard pile)
- Tomato, pepper, and squash vines at season’s end: compost if disease-free, discard if showing late blight or heavy mildew
Be thorough with tomato and squash vines especially — their debris harbors the spores of the diseases that plague those crops. A clean fall bed is one of the most effective disease-prevention measures you can take.
Step 2: Assess and amend the soil
With the bed cleared, assess what you’re working with:
Test drainage by watering and watching. If water puddles for more than a minute, the soil has compacted and needs loosening — fork it lightly and work in perlite if drainage is significantly reduced.
Check pH if it’s been more than a year since you last tested. Most vegetables prefer 6.2–6.8. If below 6.0, add agricultural lime and work it in now — lime takes weeks to affect pH, and fall addition lets it work through winter before spring planting.
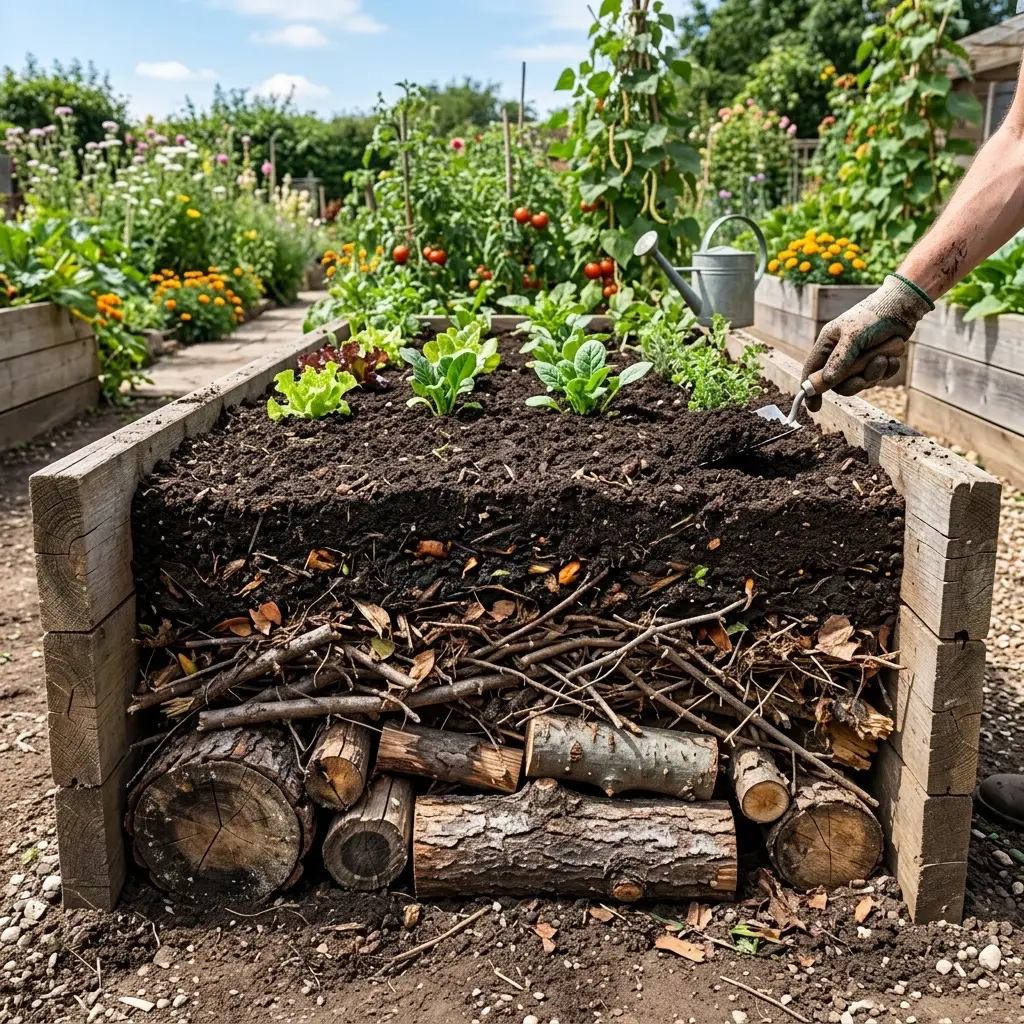
Add compost. This is the core annual renewal step. Spread 1–2 inches of mature compost over the entire bed surface and work it into the top 4–6 inches. This replenishes organic matter consumed by the previous season, improves soil structure, and feeds the soil biology that feeds your plants.
For guidance on high-quality compost and soil mix options, see best soil mix for raised garden beds.
Optional: Add a slow-release fertilizer if you’re not planting a legume cover crop. A handful per square foot of 10-10-10 or rock phosphate sits in the bed over winter and becomes available for spring crops without any additional work.
Step 3: Choose a winter protection strategy
Three options, in order of long-term benefit:
Cover crop (best for soil improvement)
Cover crops protect and improve the soil simultaneously. They establish roots that break compaction, fix nitrogen (legumes), and produce organic matter that feeds soil biology when you incorporate them in spring.
Best cover crops for raised beds:
| Crop | Winter behavior | Key benefit |
|---|---|---|
| Oats + field peas | Winter-kills (zone 6 and colder) | Fast coverage; dies, mulches itself; no tillage needed |
| Crimson clover | Survives mild winters | Nitrogen fixation; attracts early pollinators when it flowers |
| Winter rye | Very winter-hardy | Deep roots break compaction; large organic mass for spring |
| Austrian winter peas | Survives hard winters | Heavy nitrogen fixation in colder zones |
Sow cover crops 4–6 weeks before your first hard frost. In beds where you’re planting garlic, leave garlic rows clear and plant cover crop in remaining space.
In spring, cut the cover crop at soil level 2–3 weeks before you want to plant, let it break down on the surface, then transplant through it or incorporate lightly. No-till cover crops (like oats/peas that winter-kill) require the least work in spring.
Mulch layer (simplest)
Spread 2–3 inches of straw, shredded leaves, or wood chips over the bed surface. Suppresses weeds, insulates soil, prevents compaction, and adds organic matter as it breaks down.
Shredded leaves are excellent mulch and free if you have trees. Run them through a mower before applying — whole leaves mat together and can repel water.
Compost cap (lowest effort)
If you added compost in Step 2 but don’t have time or seeds for a cover crop, simply leave the compost on the surface without working it in. Rain and earthworms will incorporate it over winter. Not as effective as a cover crop but far better than bare soil.
Step 4: Protect the bed structure
Beyond the soil, the physical bed structure needs attention:
Wood beds: Cedar and redwood handle winter moisture well. Pine and untreated softwood are vulnerable to rot at the soil line — check these joints in fall and apply wood preservative or oil if needed.
Metal beds: Galvanized steel handles winter without any maintenance. Check that corner connections are still tight — frost cycles can loosen bolted connections over multiple winters.
Beds on legs: Check that legs haven’t shifted or sunk. If the bed sits on bare ground, a thin layer of gravel under each leg foot reduces rot contact and leveling problems.
For a guide on bed material lifespan and maintenance, see metal vs. wood raised garden beds.
Step 5: Plan for next year
Fall is the best time to plan next year’s layout — the beds are empty and you can see the whole space clearly.
Rotation notes: Write down what grew where this year. Tomatoes, peppers, and eggplants shouldn’t return to the same bed two years in a row. Brassicas (cabbage, broccoli, kale) should also rotate. Simple notes on a piece of paper or a phone photo of the bed now prevents guessing in March.
Garlic: If you’re growing garlic, plant it in fall (October–November) after clearing summer crops — it overwinters and harvests in early summer. Full guide: growing garlic in raised beds.
Seed orders: Order seeds in November–December when selection is fullest. Popular tomato and pepper varieties sell out early. Having seeds by February lets you start seedlings indoors 8–10 weeks before your last frost date.
Fall prep checklist
- Clear and compost all spent summer crops
- Discard or hot-compost any disease-infected plant material
- Fork soil lightly if compacted; check drainage
- Add compost (1–2 inches worked into top 4–6 inches)
- Test and adjust pH if needed (add lime in fall for spring benefit)
- Sow cover crop OR mulch the surface
- Plant garlic if growing it (October–November)
- Check bed frame; repair or treat wood as needed
- Write down what grew where for next year’s rotation
- Order seeds for next season
For your first season in raised beds, see raised bed gardening for beginners. For the mistakes that quietly reduce harvests year over year, see 9 raised bed gardening mistakes to avoid.
Frequently asked questions
When should I start prepping my raised beds for winter?
Start fall raised bed prep after your last harvest but before the first hard freeze — typically October in most of the US. The key tasks (clearing crops, adding compost, planting cover crops) need to happen while the soil is still workable and above 40°F. In zones 8–10, this extends into November or December.
Should I cover raised beds in winter?
Yes. Covering raised beds over winter protects soil from rain compaction, prevents nutrient leaching, suppresses winter weeds, and keeps soil biology active longer. Options: a cover crop (best long-term improvement), a 2–3 inch mulch layer (straw or shredded leaves), or a row cover if extending the season for cold-hardy greens. Leaving beds bare is the worst option.
Do I need to replace raised bed soil every year?
No — but you do need to replenish it. Each year, add 1 to 2 inches of mature compost to the bed surface in fall or early spring. This replaces organic matter consumed by plants, maintains soil structure, and feeds the microbial life that makes nutrients available. Without this, beds become measurably less productive by year 3 or 4.
What are the best cover crops for raised beds?
Oats with field peas (winter-kills in zone 6 and colder), crimson clover (nitrogen fixer, reseeds), and winter rye (extremely cold-hardy, large organic mass) are the best options for raised beds. Choose shorter varieties that don't require mowing. Austrian winter peas mixed with oats provide fast coverage and significant nitrogen fixation.
Can I leave my raised bed empty over winter?
You can, but it's not ideal. Bare soil loses structure to rain and frost, weeds establish, and nutrients leach. A cover crop, mulch layer, or several inches of compost on the surface takes 20 minutes and measurably improves the bed's spring condition. The time investment pays back immediately at planting.
When should I stop watering raised beds in fall?
After clearing summer crops and before the first freeze, water the bed deeply once if the soil is dry — this supports any cover crop establishment and keeps soil biology active. Once winter temperatures arrive and natural precipitation takes over, supplemental watering is rarely needed in most climates.